
By Eric Freese
Box photographs courtesy of www.Oldmodelkits.com
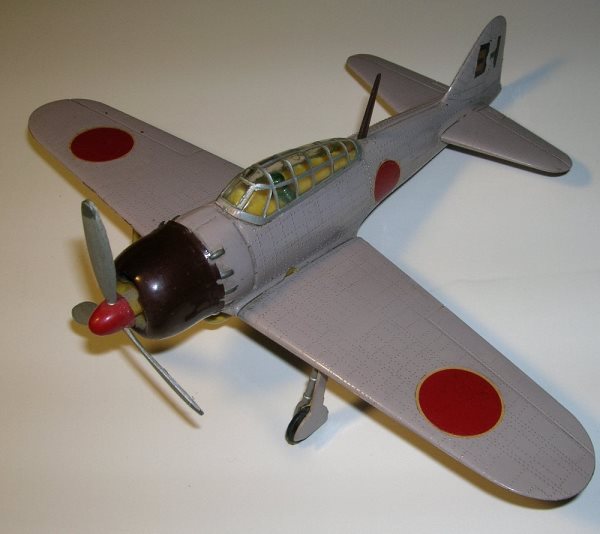
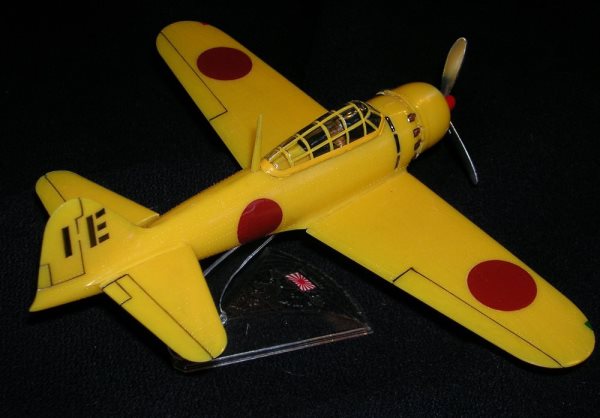
Virtually anyone I meet at an air show, museum, or the local hobby shop has a list of their favorite planes, ships or cars. Personally, I can’t get enough of the Zero. I put it among my top ten favorite designs because it is pure fighter, perfectly proportioned in line and form.
The ‘classic’ Zero is the

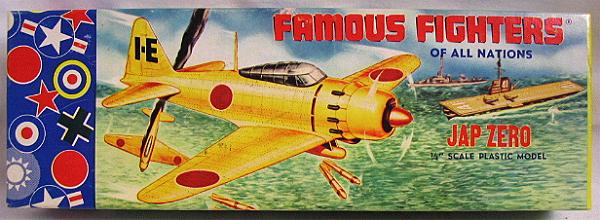
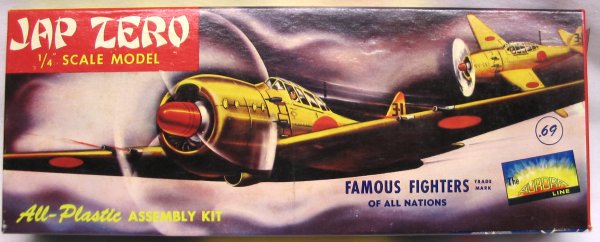
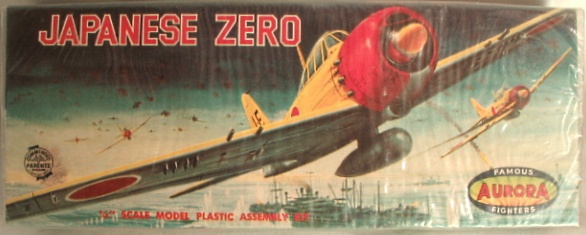
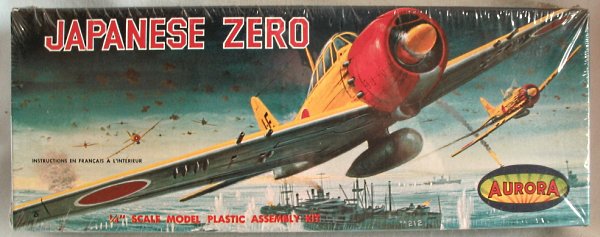
Various issues of the Aurora Zero (click any to enlarge)
I enjoy ‘classic builds’ and restoring older kits, but the Aurora Zero has been conspicuously absent from my collection. Recently I wrangled a deal to buy a pre-built version. There was no box, just the model, but I was thrilled at the prospect of finally getting one!
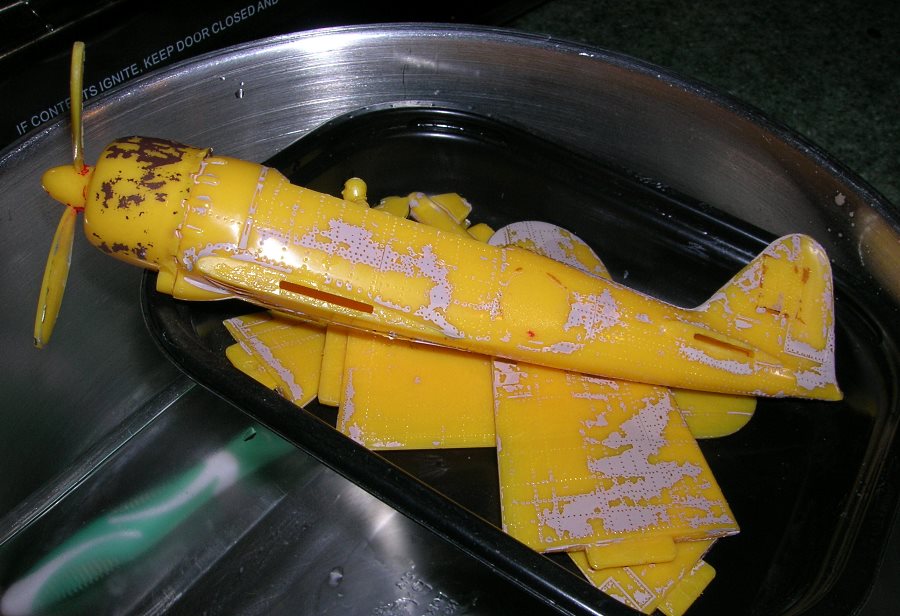
Aurora Zero in ‘as found’ condition


Detail photos (click any to enlarge)
Before we get started, please note that this article deals with potentially dangerous chemicals. I cannot over emphasize, especially to kids who have never dealt with these products, that extreme caution and personal protective gear is essential. Follow all instructions from the manufacturers regarding safe handling and disposal of the chemicals. Kids…get a parent to supervise these procedures! NEVER, EVER combine any two or more products!!!
Disassembly
Disassembly is a big step toward restoration. Bleach can sometimes be successfully used to break down the old tube glue. After an overnight soak, the parts usually just fall apart. It does not seem to whiten the colors of the plastic. For example, I once had a Cessna 310 that was a mess, a real ‘glue bomb.’ Even after 24 hours submerged in the bleach, it held color just fine after 24 hours of submergence. But bleach is dangerous stuff if it is not treated with care. Be sure to use it in plenty of ventilation and with eye and skin protection.
The Zero was fairly loose, so I disassembled it without bleach as best I could into sub-components. When it came to the cowling, I messed up. While trying to ease it free by gently prying away behind the cowl flaps, I proceeded to crack off a bit of a cowl flap. Great! Nothing would budge the cowl and the fuselage was bonded rock solid as well. Clearly it was time to fall back and regroup. The bleach beckoned me, “Use ME, use ME…!”


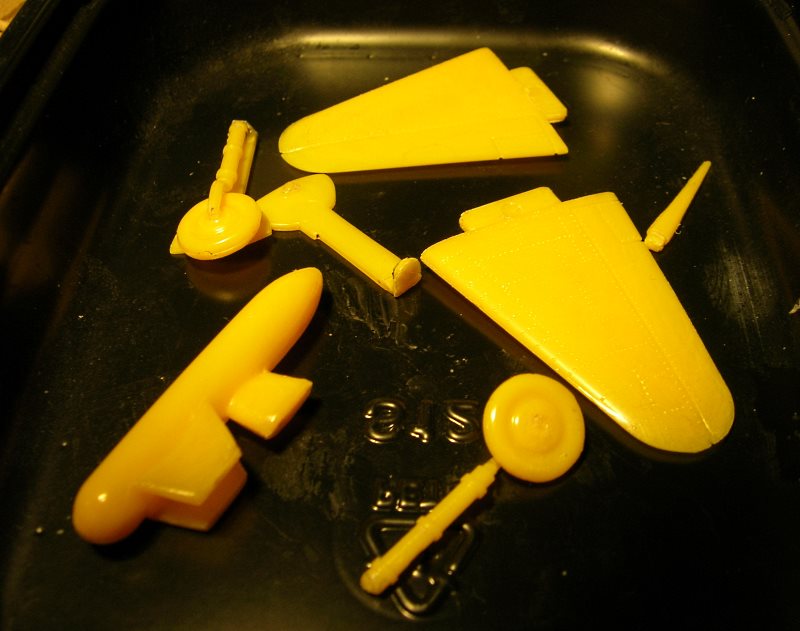
Zero disassembly (click any to enlarge)


(click any to enlarge)
Stripping
As the majority of this very simplistic kit was already apart, I put the bleach away. For paint removal, I brought up the big guns…Oven Cleaner. (Note: leave the clear canopy for a different treatment later.) I pulled out my safety glasses, rubber gloves, a clear Pyrex bowl, a stainless pan and a glass lid. I rounded up spare newspapers to protect the deck and glove and glasses to protect me! This is supposed to be fun…remember? But don’t worry, its coming!
Fumes from over cleaners are vile. They will choke and even gag you, so I advise using a paint mask as well. When spraying, do it outside, make sure no pets or plants are in range and watch where the breeze is so the fumes are carried away from you. I hosed the parts thick with cleaner, put all in the pan and closed the glass lid to reduce evaporation and still have a way to observe the action. Now it was safe to take it inside from the winter night.
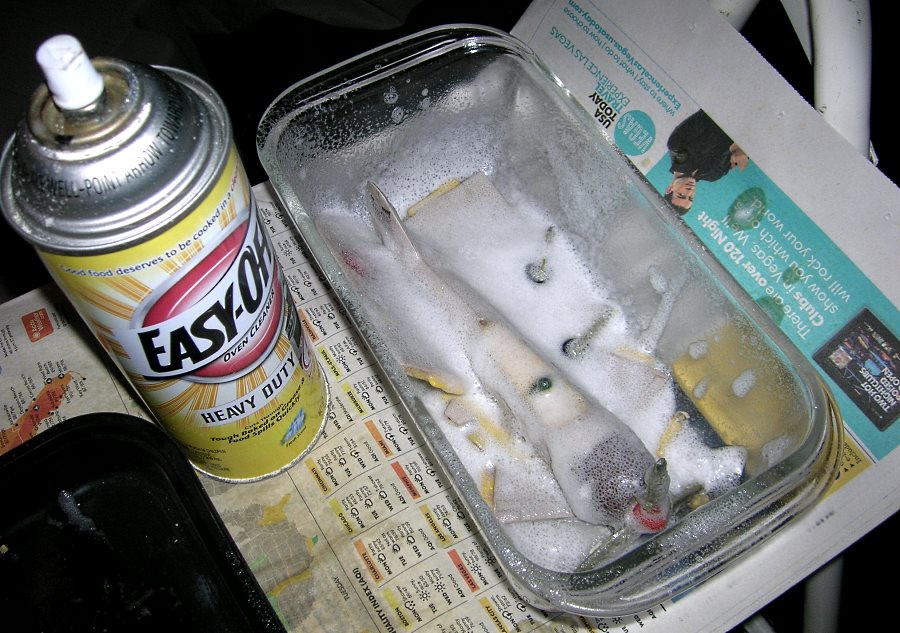
Stripping with oven cleaner (click any to enlarge)
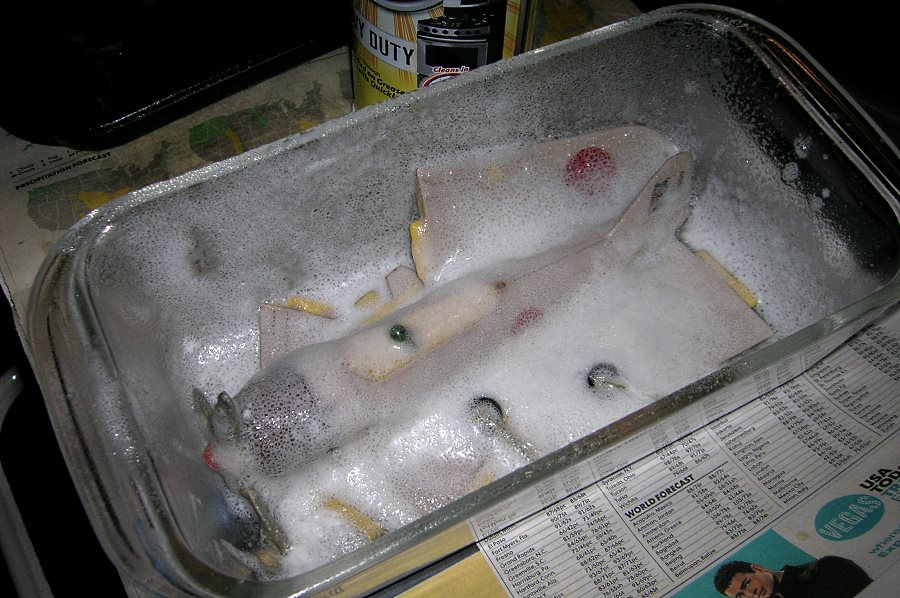
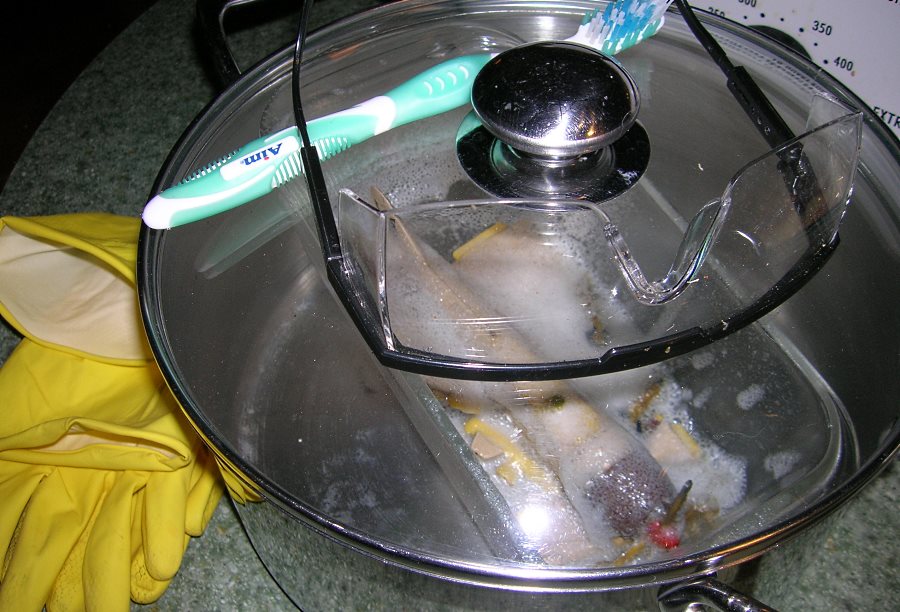
About 30 minutes in, I donned the gear and headed for the kitchen sink. Armed with gloves, glasses, and an old toothbrush, I proceeded to gently scrub away at the old paint and decals. The nasty goo began to yield a yellow color of plastic here and there. It was slow going, but I was getting there. I rinsed all parts and studied this bird. It needed another treatment. Alas, back to the porch!
Try, try, again! Another 20 minutes or so, back to the sink for more brushing…and this time I got smart about the final stubborn bits that were hanging on. I looked up and saw a scrubber sponge with the plastic abrasive “wool” on one side. Ah…DONE! We learn as we go. When the parts were finally clean, I rinsed them and washed the gear, sink and everything else. Exercise care because the oven cleaner is very aggressive!
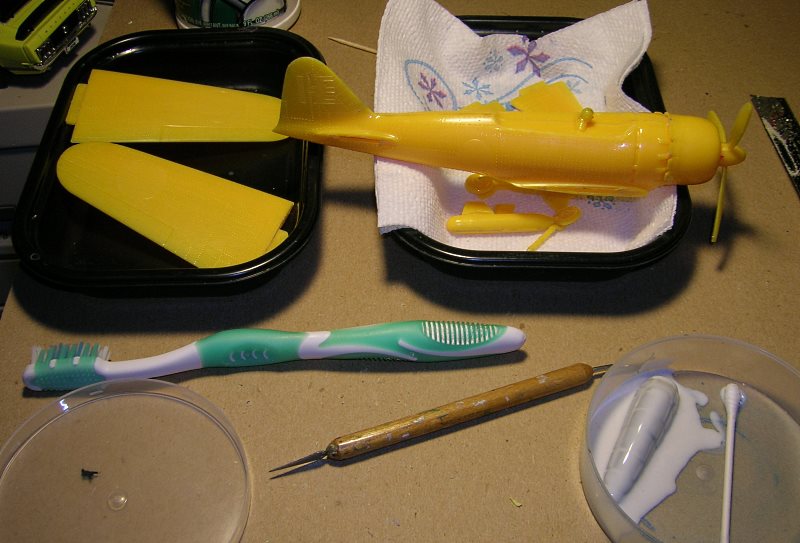
(click any to enlarge)
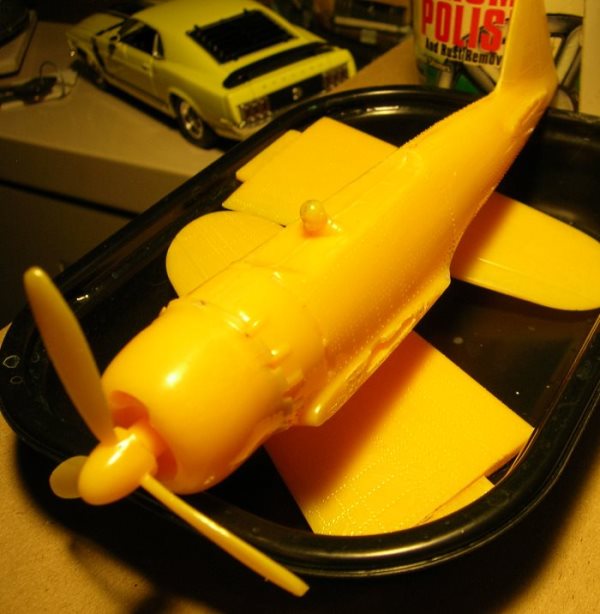
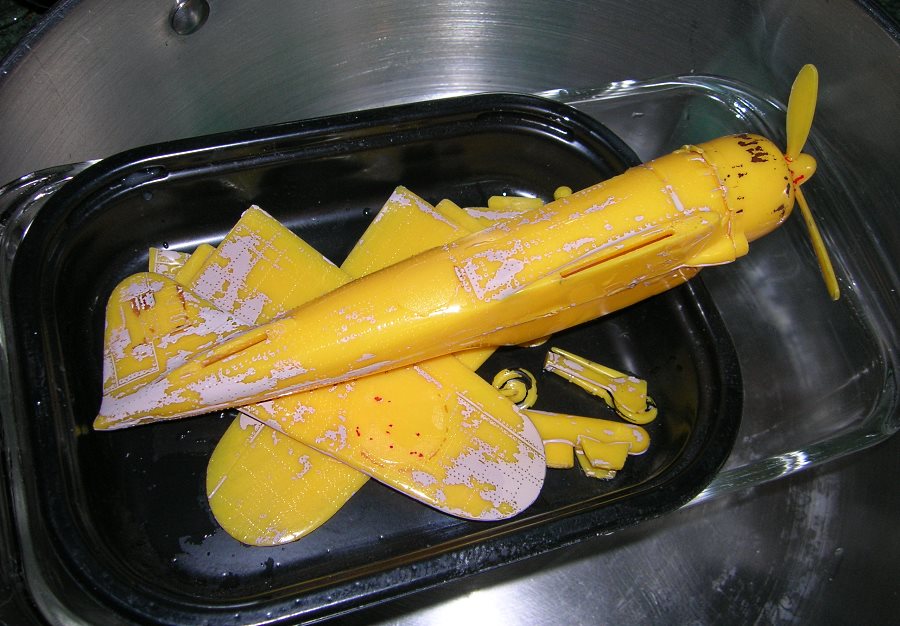
Beautiful original plastic!
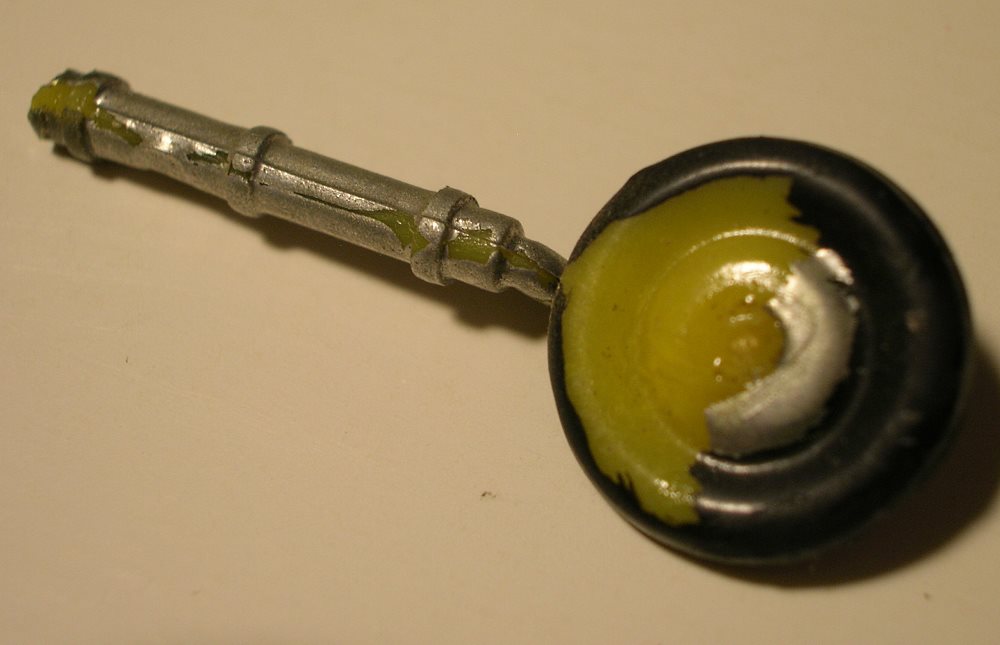
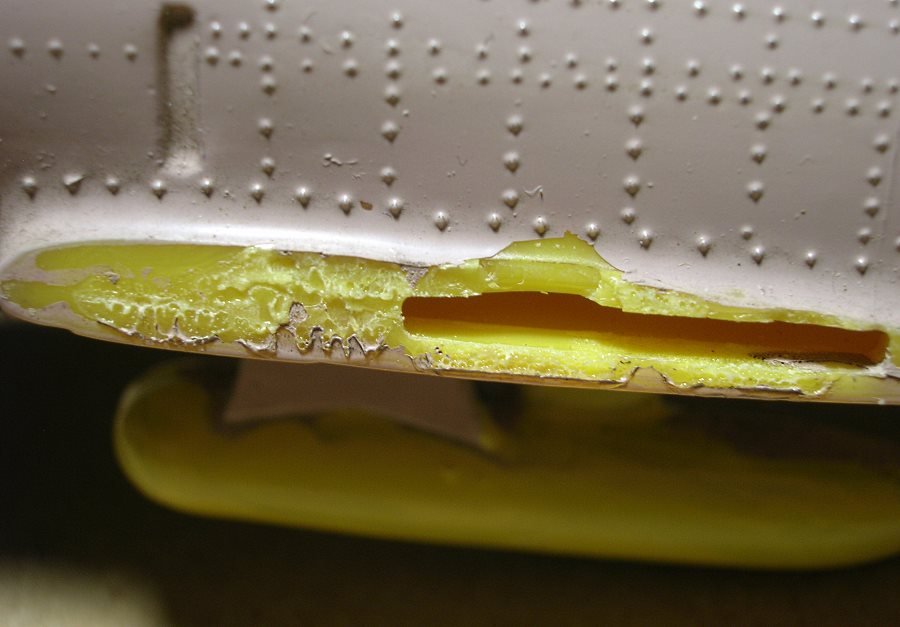
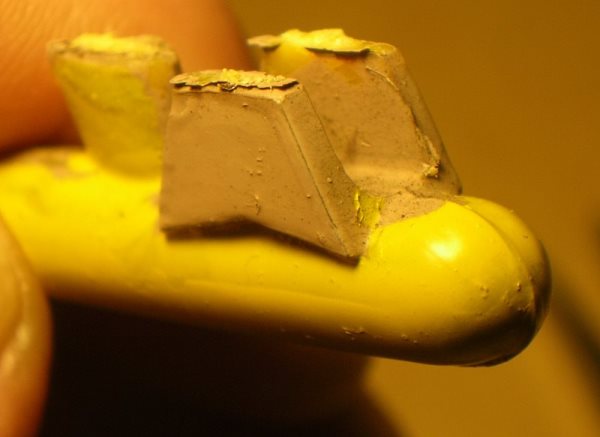
Finally, I could see canary yellow plastic everywhere! It was like a new kit sitting on the towel. Now I’m getting excited! There are not a lot of parts to deal with. The wings and horizontal stabilizers are solid (not split) and that made them easy to work with. The fuselage was simply two halves. There is no cockpit and the cowl was still stubbornly glued on in front. I set aside the gear and doors then removed the drop tank. The tank also refused to come apart. At that time I noticed that the inboard gear doors are molded as part of the left and right tank halves!
Aurora Zero belly tank
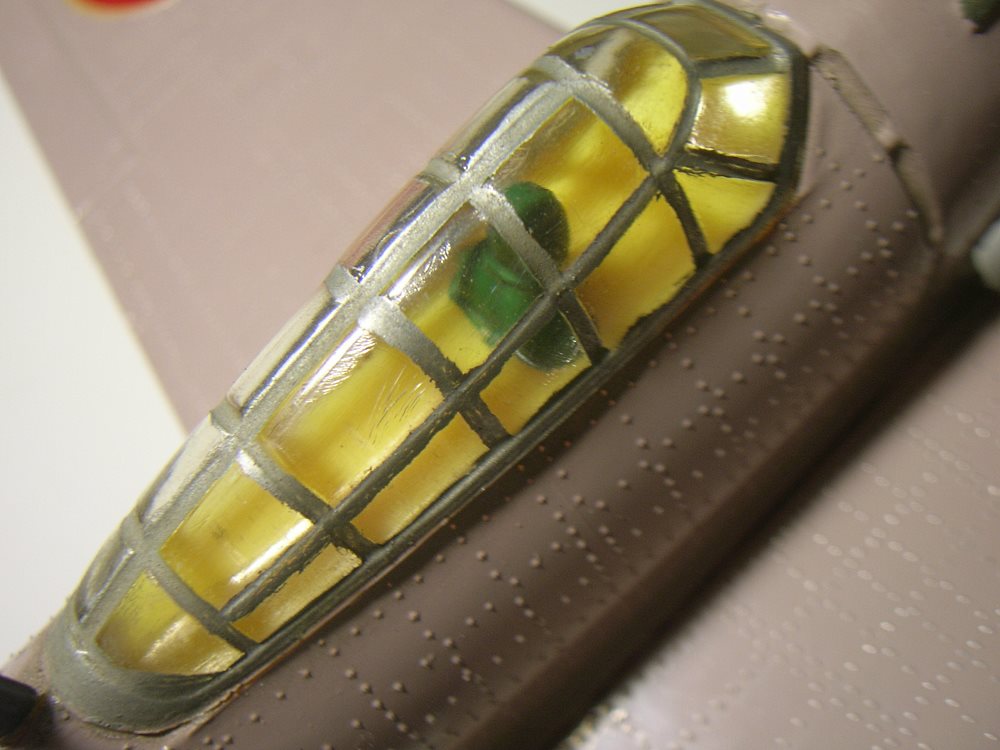
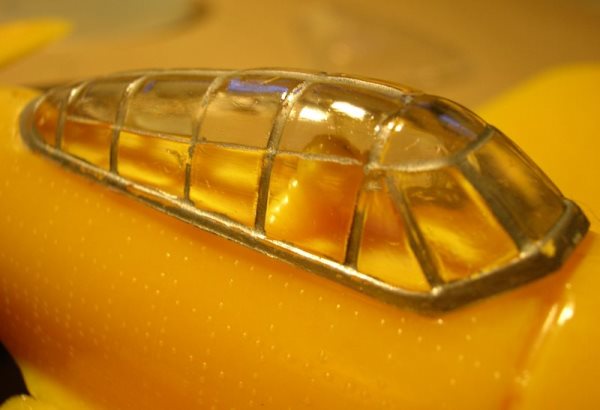
Canopy
I headed for the hobby room as there were more chemicals in store. The canopy was given a heavy coating of Turtle Wax brand chrome polish. Note: I use gloves here and it has a slight ammonia odor. The chrome polish gently attacks old paint and gently polishes the canopy as well. A long submersion in DOT 3 brake fluid (often many days) works well as an alternate. I used a Q-tip swab to coat the canopy, then sealed it in a small plastic container to soak.


Zero canopy (click any to enlarge)
Fitting and Assembly
I proceeded to file away the rough deposits of glue on the wing tabs and where the wing root mates to the fuselage. An all-important test fit showed that the left wing would not allow any dihedral at all. Considering that the plastic was so brittle that the cowl flap snapped away, I was not going to try bending the tab. I filed away a bit of the tab top and it helped a wee bit- but not enough. So I dug away at the inside of the fuselage alignment slot. After opening the upper edge a bit and repeated test fittings, it came out perfect. I then glued the wings and used a weight to ensure the proper angle while the glue set.
Next was the tail assembly. There were no major no issues- just file, test fit and glue. In only minutes, the Zero was 90% done! The canopy called to me and I tackled the paint removal along the frames- or not. Gently scrubbing away with Q-tip swabs, I tried in vain to get it 100% paint-free. 30% was a more realistic goal since a 24 hour soak barely phased it. In the end, the paint was cleaned off the areas that needed to be clear. I wiped it down, polished it bright, rinsed and then used a Q-Tip to glaze it in Future floor wax.
I never try to push a model but work within the limits that it imposes. As the canopy was a 50 year-old, clear, brittle, piece of plastic, I didn’t push it. I would have to paint the frames anyway. In this case, less is more.
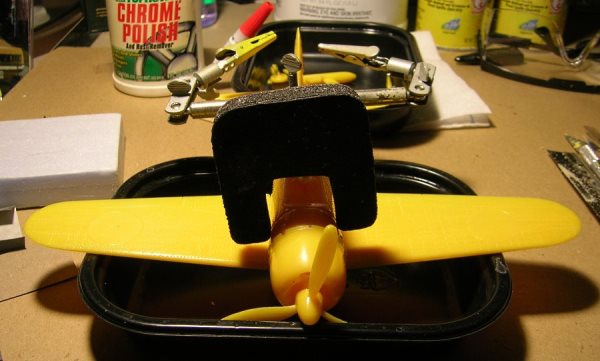
Display Stand
Now it appeared that I had a side project ahead- scratch-building a clear display stand support stem. I had an
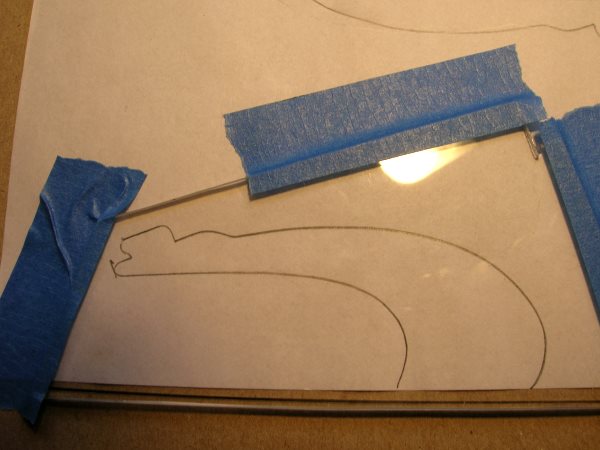
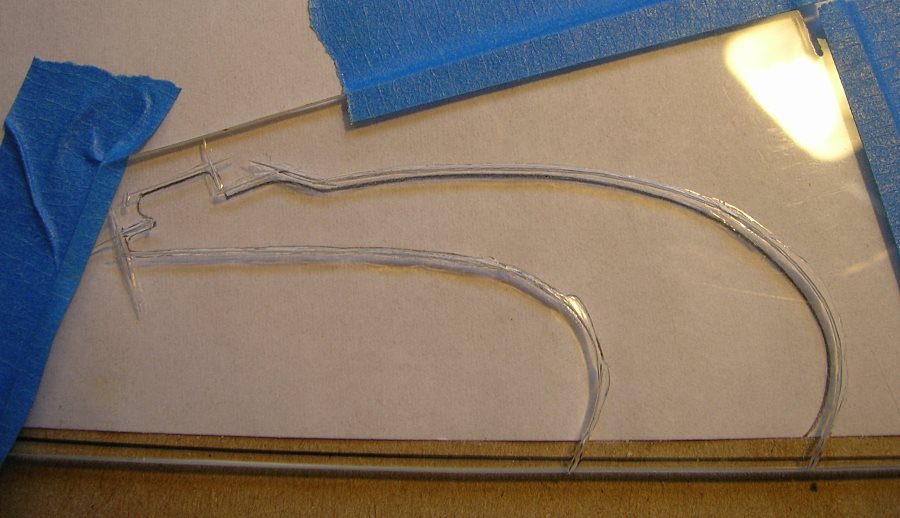


Making the stand arm (click any to enlarge)
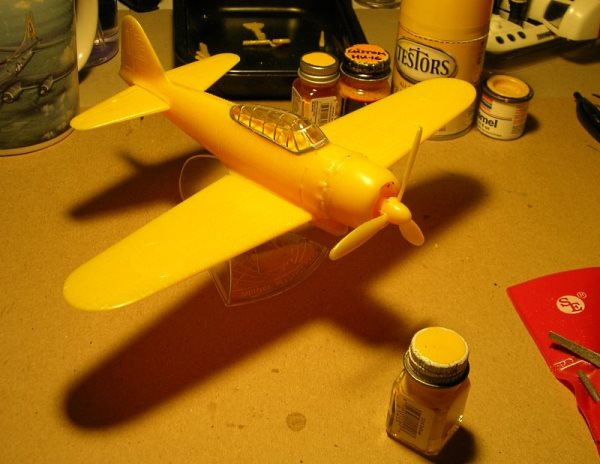
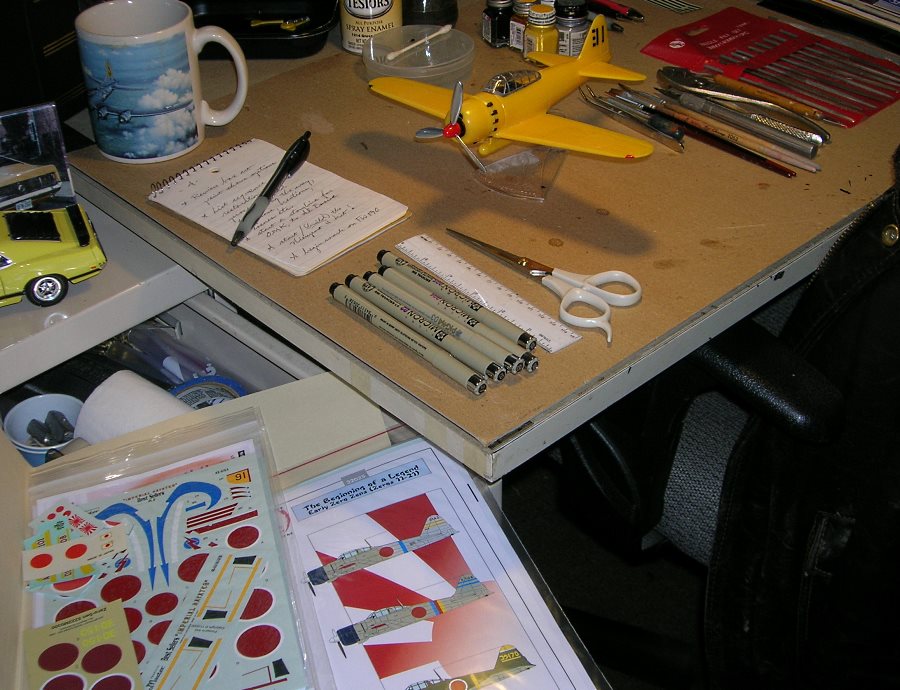
Decals, Final Assembly& Paint
Careful filing and gentle sanding for fit, followed by a careful paint job, (to match the box art), will yield a “classic build” of a classic plastic plane. How classy is that!? Decals of course are spares, scraps and black strips for the tail numbers and the wheel wells. As this was pure raw plastic, and no putty to fill seams, I had an interesting minor issue to tackle. How to paint without paint?
(click to enlarge)
The wheel wells “needed” to be black inside…but
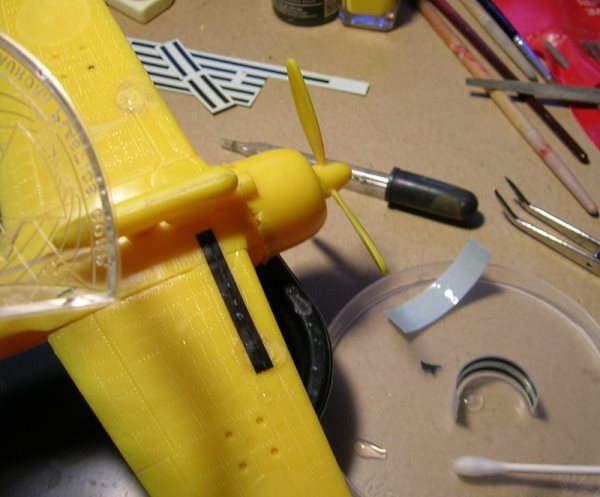
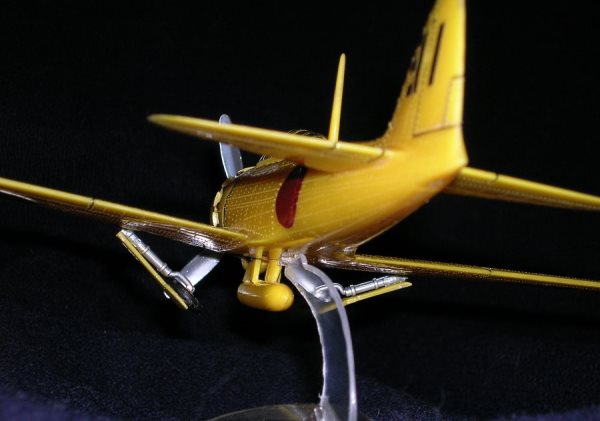
Next up was the gear. Since I had a complete display stand now, I had every intention of putting it to use! So I chose to angle the gear “coming up.” This is similar to the “Mustang Madness” P-51 kit build article.


(click any to enlarge)
Now I was in the home stretch with the painting of the canopy frames. Since this had (and still has) silver applied to the frames, I had no choice but to repaint the frames silver to pull it all together. Remember that a canopy really needs TWO colors, the primer or raw aluminum paint (as seen from inside the canopy), and the outside colors. Actually, a correct Zero would have a metallic blue finish inside which was a tinted sealer / varnish over alclad.
Once the canopy was sealed with Future and dried, I did NOT relish masking a very deeply scored canopy and hand painting several coats, so I opted for the easier way. I applied thin strips of yellow decals for frames. This resulted in good coverage, no runs, no seepage under a masking and arrow straight lines.
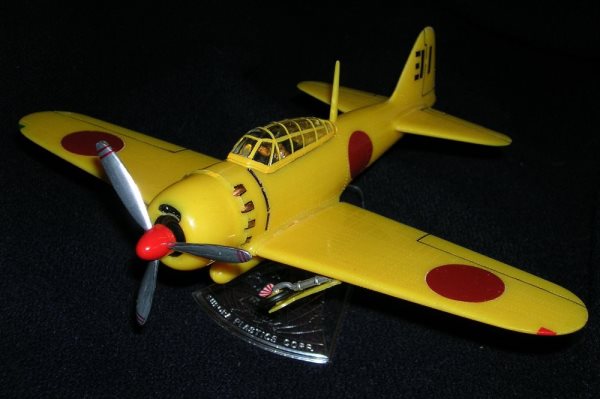
Make no mistake; this does not depict an authentic Zero. It depicts a 1950s/60s style

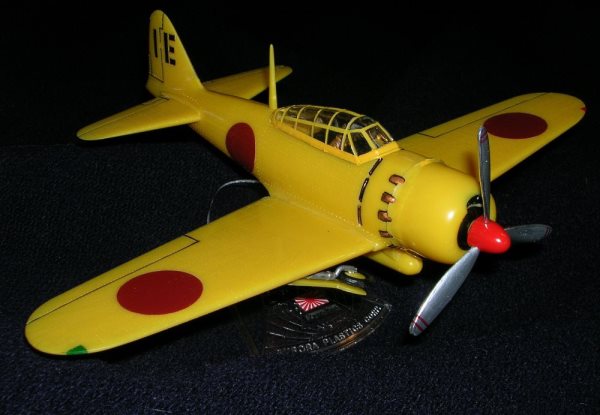
One key note here- this is “classic build” restoration. That means do whatever works for you. There are no hard and fast rules here. I chose to go with just the raw plastic color, no putty, no (overall) paint job, just 60’s style trim colors…as I would have done it back then. Paint it the way you want, or no paint at all!
The total project time was about eleven hours and I loved every minute of it!
Times given exclude soaking or drying times…just labor. I estimate it took
- About two hours to disassemble and
- Two hours to apply stripper and scrub off same.
- Three hours to file, sand and scrape clean all parts
- One hour for assembly overall.
- Two hours for painting
- One hour for decals
After years of wanting, waiting and hoping, she is done. I can’t stop seeing her and grinning.
Materials List
Testors brand oil-based paints, basic colors of red, silver, black, yellow, brown, tan, and copper, (exhaust stacks). The two extra touches were homemade black decal trim for wheel wells and tail numbers. Also a big help in breaking up the monotony of solid yellow wings and fuselage were the thin black lines. I used a “Micron” .02 micro pigment ink pen. These are available at any good art supply/craft store in the art department.
Chemicals
Bleach (cancelled for this job), Easy Off oven cleaner, Future floor wax, Turtle Wax brand chrome polish, cyanoacrylate (Crazy Glue), “white -glue” (Elmers) for the canopy, Micro-Sol decal setter and various oil-based paints and thinner.