
By Eric Freese
After posting Eric’s article on how to do a Classic Build (using a Monogram P-40), I asked if he could make an Aurora kit look that good. Well, he did. I was blown away by the results. And better yet, all of this without excess effort – a true build-up for pleasure and decompression only! I hope you enjoy this build as much as I do. – AB

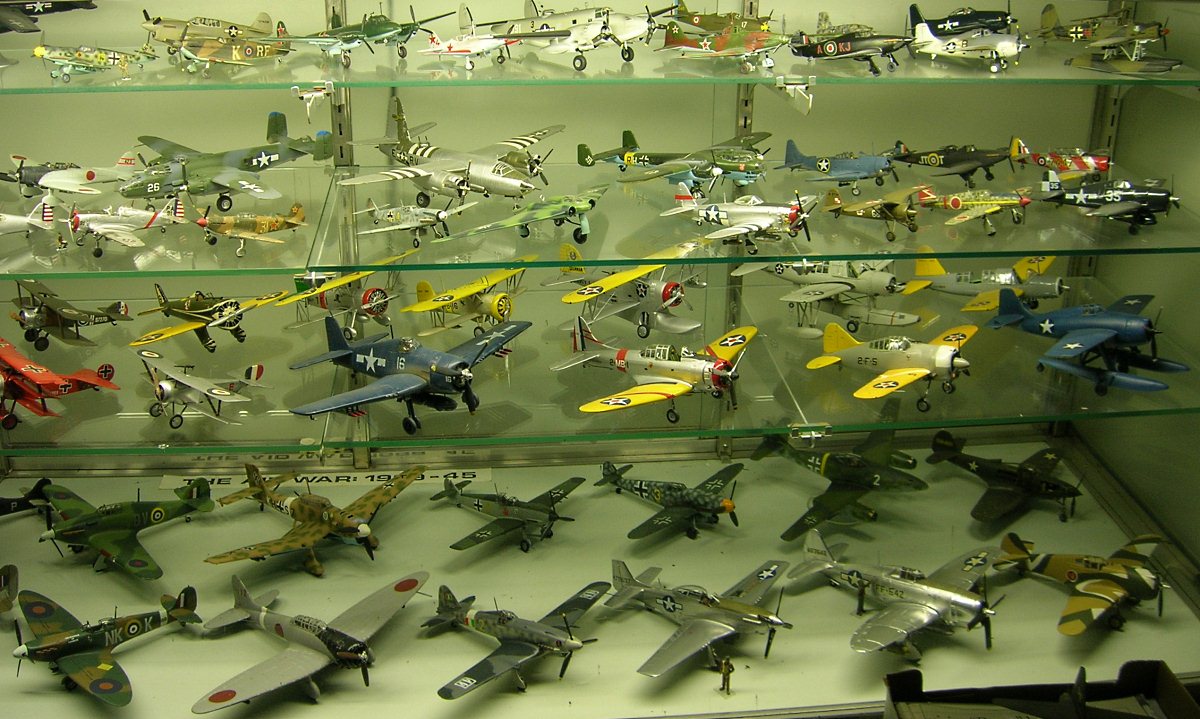
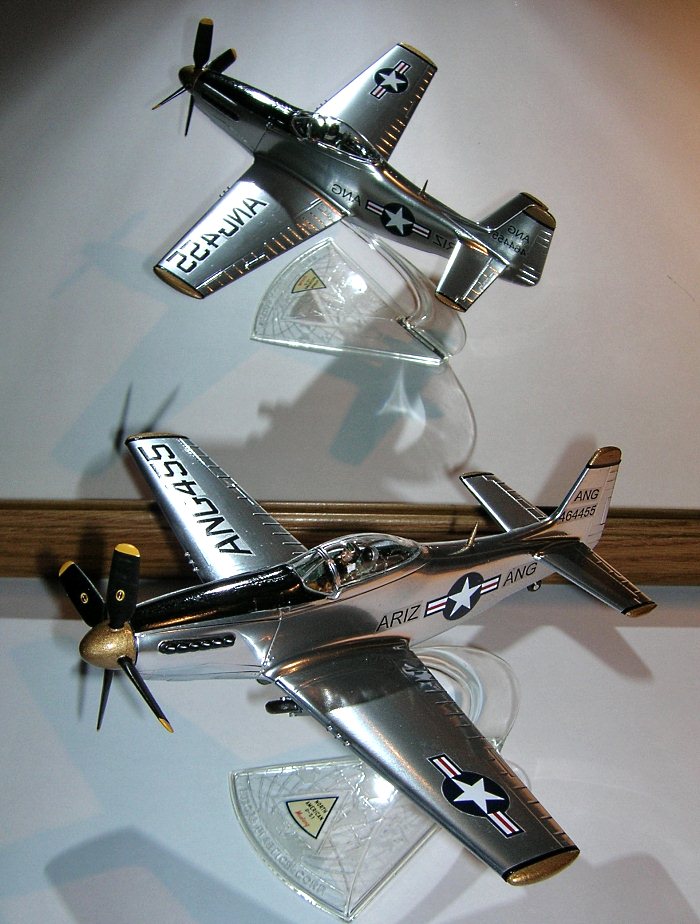
Some of Eric’s Classic Builds alongside newer kits (click either thumbnail to enlarge)
When Alan Bussie asked me to put forth a simple “decompression” kit, I couldn’t resist the
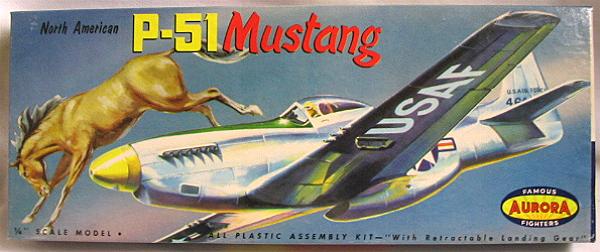
Aurora’s 1/48 scale P-51 Mustang
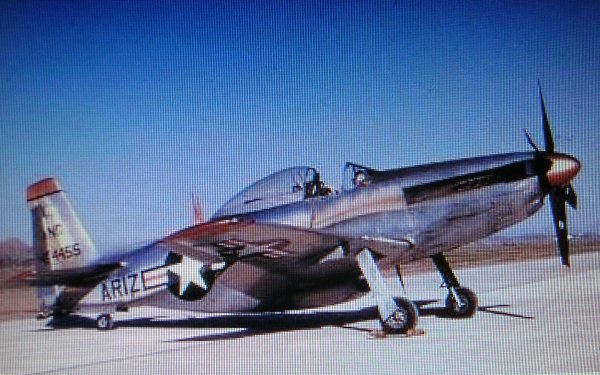
In my e-mails one night was a string of color photos of P-51H fighters, compliments of fellow Master Modeler Dick Hague. They included two clear pictures of an Arizona Air National Guard P-51 with metallic gold trim. I was totally hooked!
I had to get started.


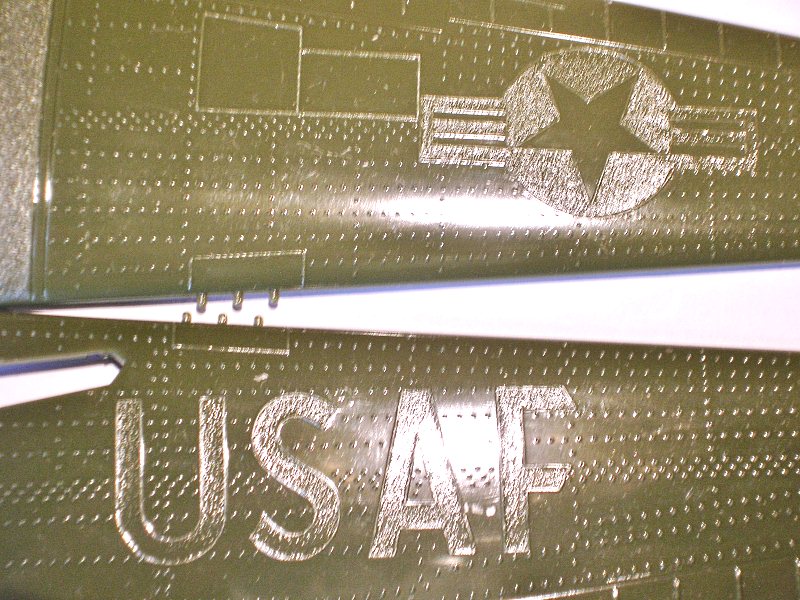
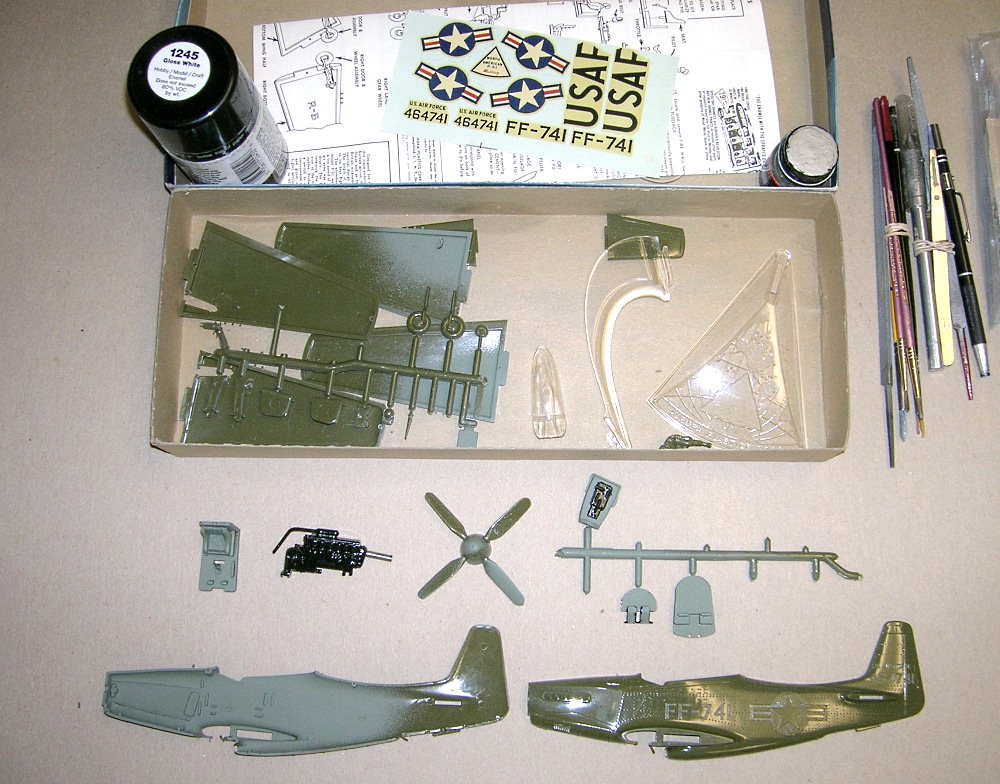
Parts overview and close up of rivets (click to enlarge)
First step was the basic zinc chromate interior primer for the cockpit, gear doors, and inside of engine compartment. Gloss black was used on the engine, radio rack and instrument panel. A careful dry brushing with a hint of silver paint made the details “pop.” Next up was the prop, which was the only real flash issue encountered. This took a few minutes to gently clean up. Since I was going to hit the spinner with a metallic gold paint, I chose a white basecoat to brighten it up, versus the olive drab plastic of the kit. The prop blades are a bit too thick, too short, and incorrect pitch. Whatever! This is a “decompression” job. I’m not flying into combat!


Interior and prop paint, painted details (click any to enlarge)
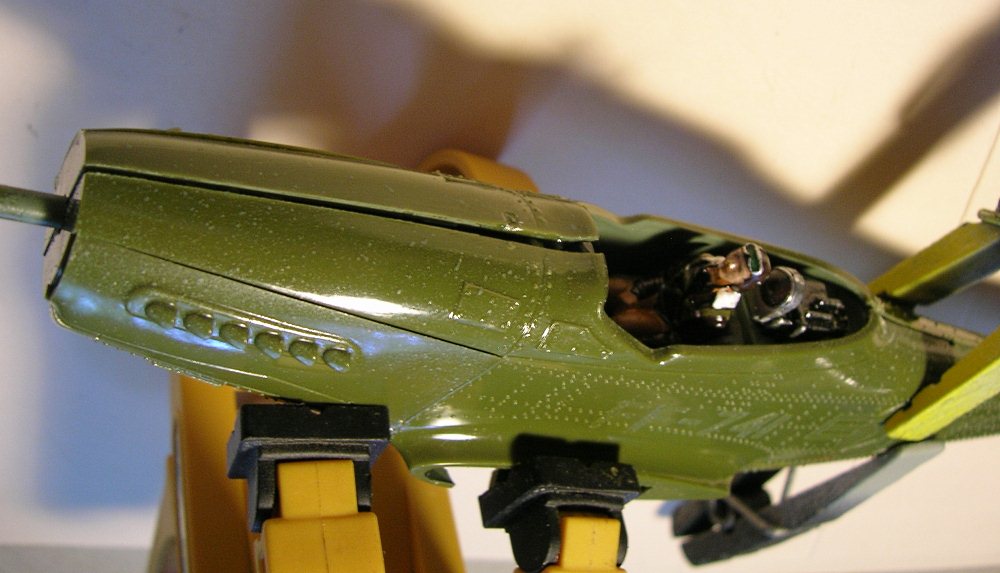
Next up was the pilot. He was not too shabby and required only minimal trim work. The oxygen mask needed to be restored with some putty, but not this time! I painted him medium brown overall. Once dry, I added an off-white “fleece” collar (textured as such by
The landing gear comes in two parts: struts and doors. The left door and wheel are labeled “L” and the right side “R” so you cannot confuse them. Door hinges are two tiny pegs at the top of the door assembly, so be careful not to trim them off. Since I was building with the display stand in mind, I was going to build “gear up” or actually retracting. I can picture the presentation!


Landing gear close-ups and pilot (click to enlarge)
The next step was to review the overall interior sub-assemblies. With the paint done, I add the engine and firewall assembly, followed by the cockpit floorboard and seated pilot. The instrument panel fit well in the alignment slots.
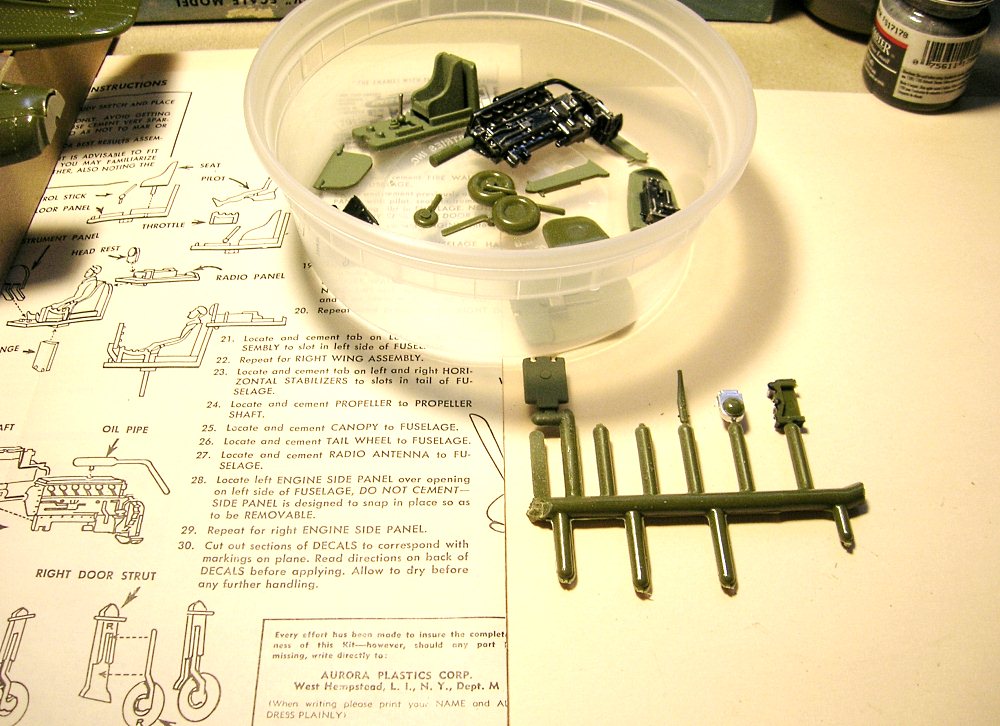

Details painted and sub assemblies built (click to enlarge)
But this is where I walked into a snag. When it came time to mate the two fuselage halves, the cockpit area would NOT mate up! I had broken the prime rule of “Test Fitting Before Gluing.” As I was using Crazy Glue and it was too late to move parts around a bit and the parts were not very accessible anyway. So I pulled the fuselage apart and filed down the lion’s share of the exposed side by about 1/8 inch or so. It was not great, but it helped enough to clamp the join lines closed. Whew! I strongly suggest that you file away the one side NOT holding the floorboards in place so there will be no raised mating ridges to hit or dry fit the cockpit components to the fuselage side so you can jink them about until they fit in both sides perfectly.

The gap from failing to dry fit followed by a successful clamping! (click to enlarge)
The wheel cover doors had to be gently coaxed into place by clipping a tiny amount of the hinge pegs off so they would “snap” into place. The landing gear was placed inside the wings, and the wings went together easily. Wing to fuselage lines were crisp and clean along the top with a slight gap below. But again no putty this time around! The horizontal stabilizers went on fine as did the tail wheel. Hmm, I have the makings of a Mustang here!
This is hard plastic, so I used hardware-store-grade sandpaper to remove the boilerplate rivets from the wings and fuselage. The next step was surreal. I turned on an old war movie, sat on the couch, tossed an old towel on my lap and started sanding away. For the next hour I dry sanded with 200, then 400 and finished with 800 grit. I also left the undersides untouched so as to show the effects of smooth versus rough once the silver paint goes on.
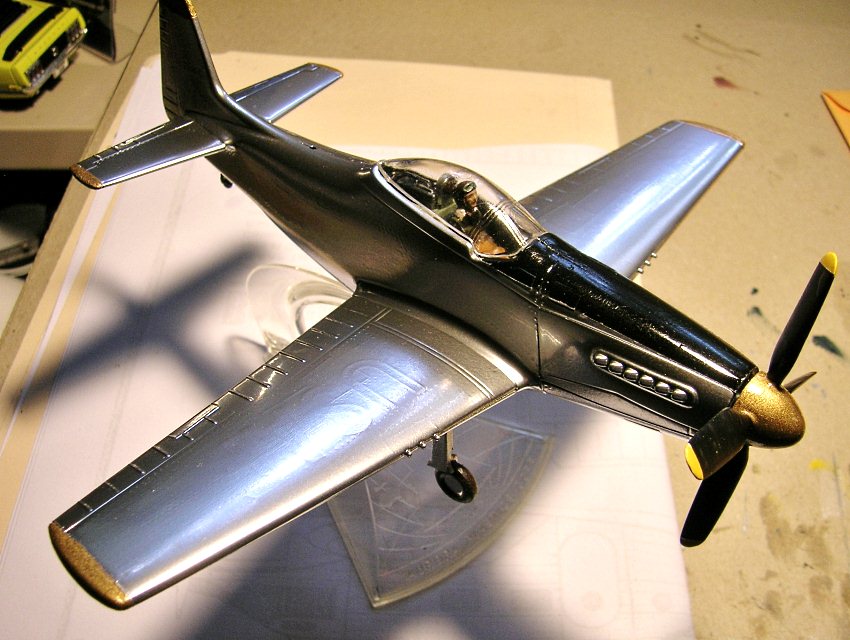
Enter the home stretch, the spray paint! I painted the wings and tail tips in metallic gold, the anti-glare panel in gloss black and let them dry overnight. To prepare the fuselage, I carefully masked it off and stuffed it with tissue. I used an older can of Rust-Oleum “Chrome Silver.” I’ve used this for a number of years and it looks like the model is actually a polished aluminum model. Normally I used mixed types and techniques, but this is “decompression” time. It came out great! Remember that this paint takes a long time to dry. It was hard not to handle it for a few days, but I left it alone for 48 hours.

Painting and done painting (click to enlarge)
The decals came from various scraps and spares, with custom ANG decals created on the computer and printed on blank decal paper with the home printer. Future Wax was used to brighten up the canopy and Elmer’s glue used to attach the canopy. Once it was set on the stand with the gear ‘coming up,” I was a happy camper. This little bit of plastic has rekindled a lot of good times in my past.
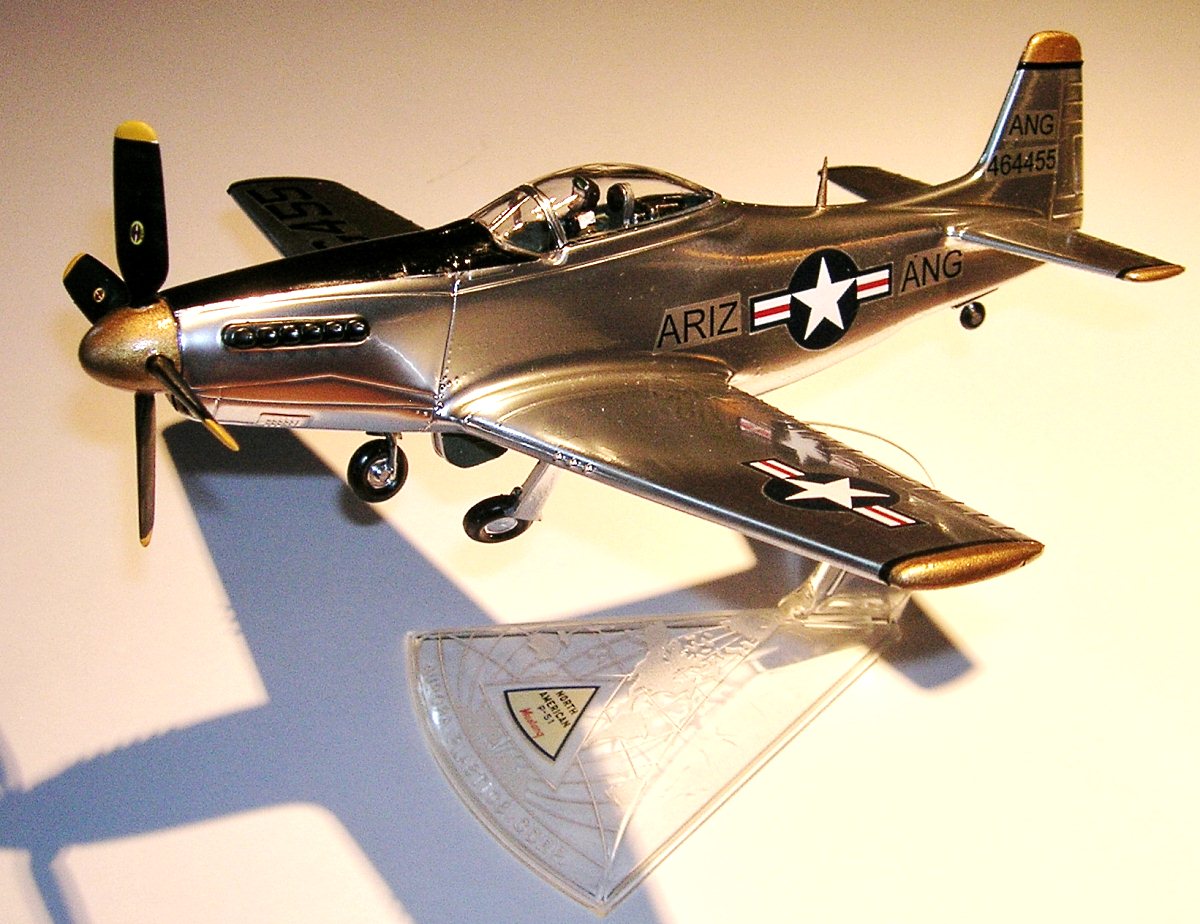

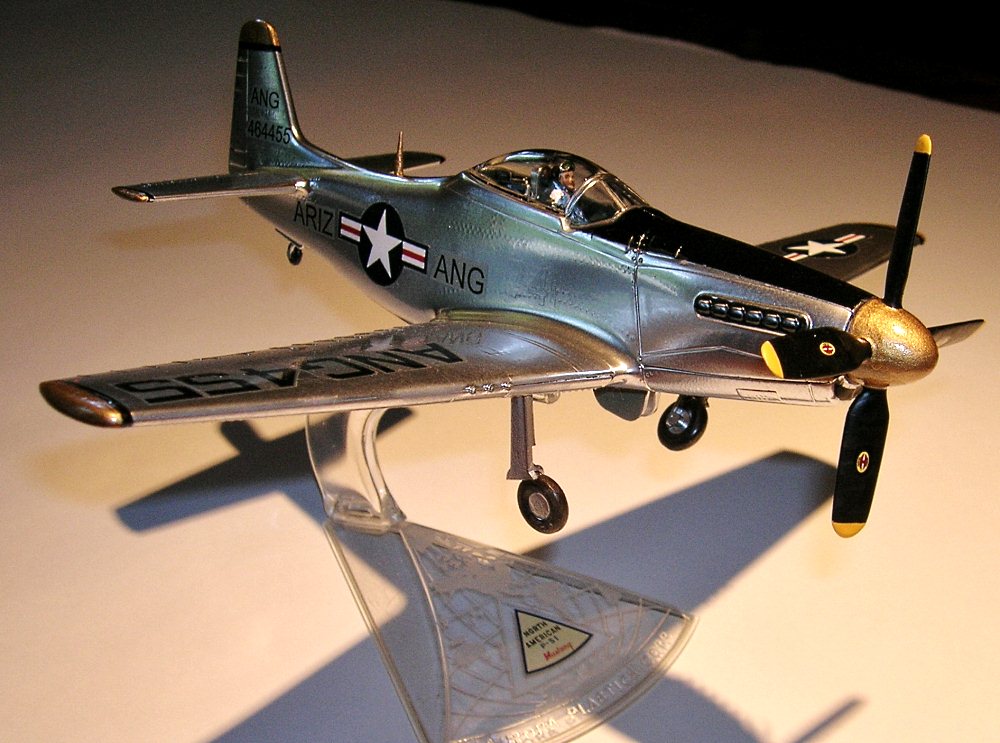

The completed model (click any photo to enlarge)
Go dust off that old kit you “ ALWAYS MEANT TO…” AND JUST GET INTO IT!!! Happy building!
Specs:
Aurora P-51 (H) Mustang 1/48 scale. Kit # 118, circa 1956. Olive drab plastic with clear canopy and display stand. Detailed engine, cockpit, working gear and prop.
Basic Testors oil-based enamels and Rust-Oleum Chrome Silver spray paint #7718, (for fuselage “silver” finish). Decals supplemented as needed.
Thanks to Dick Hague for the inspiration of the markings, and to Alan Bussie for the challenge given… and gladly accepted. Thanks to my Dad, for teaching me to build an Aurora B-47 at age six, and the hundreds of kits that followed!